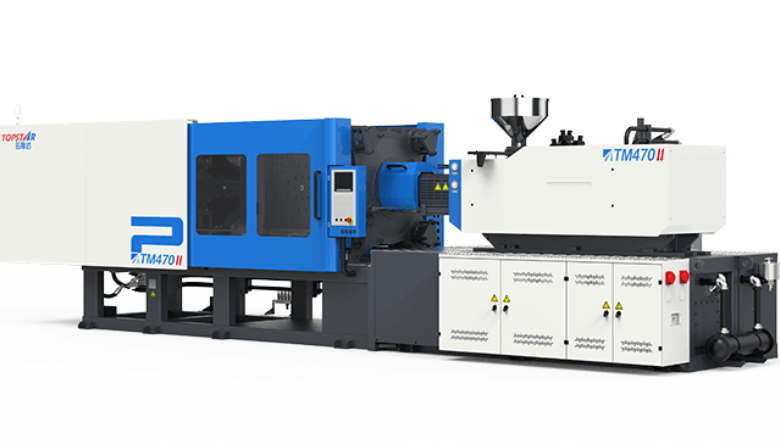
Injection moulding machine cylinder seal replacement guide

Cylinder seals in injection moulding machines play a crucial role in maintaining hydraulic pressure and ensuring consistent plasticising and injection performance. Over time, these seals degrade due to high temperatures, pressure spikes, and abrasive resin particles. When seals fail, operators experience pressure loss, oil leaks, and erratic shot sizes, leading to increased downtime and part defects.
Identifying Seal Wear on an Injection Moulding Machine
Before replacing cylinder seals on an injection moulding machine, it’s essential to confirm that worn seals are the root cause of performance issues. Common symptoms include hydraulic oil leaks around the barrel flange, inconsistent injection pressure readings on the control panel, and increased cycle times despite unchanged process parameters. Additionally, a visual inspection may reveal scratches on the cylinder rod or foreign metal particles in the oil filter, both of which indicate a failed seal. To quantify the problem, monitor the machine’s hydraulic differential pressure: a pressure difference of more than 10% between pump output and shot peak indicates an internal leak. By accurately diagnosing seal wear on an injection moulding machine, you can avoid unnecessary downtime to replace faulty parts and focus your efforts where they matter most.
Tool preparation and safety measures for replacing seals
Proper preparation ensures that your injection moulding machine cylinder seal replacement goes smoothly. First, shut off the power to the machine and lock/tag out all power and hydraulic sources to prevent accidental startup. Next, prepare the necessary tools: torque wrench, seal pick set, precision feeler gauge, soft-jaw vice, clean rags, and the manufacturer-specified replacement seal. Also, prepare hydraulic fluid and cleaning agent. Ensure the workplace has adequate lighting and ventilation, and wear the necessary personal protective equipment. Finally, refer to the service manual of the injection moulding machine for any model-specific requirements, such as cylinder venting ports or special retaining clamps. Following these safety procedures and being properly equipped can minimise risks and lay the foundation for efficient injection moulding machine maintenance.
Disassembly of the hydraulic cylinder of the injection moulding machine
After the injection moulding machine is locked correctly and the system pressure is vented, begin disassembly by removing the cylinder from the mounting bracket. Loosen the hydraulic lines at the cylinder head and collect the residual oil in the drain pan. Next, pull out the tie rods that hold the cylinder barrel and carefully remove the cylinder barrel from the injection unit. Clamp the cylinder head in a vice with soft jaws and unscrew the end cap or gland nut to the manufacturer’s torque specifications. Gently push the connecting rod assembly out of the cylinder barrel, taking care not to damage the connecting rod or cylinder bore. At this stage, each component must be labelled to ensure the correct reassembly direction. With careful disassembly steps, you can maintain the integrity of the injection moulding machine components and avoid causing new damage.
Remove and inspect the old seals.
After disassembling the cylinder, remove the worn seals using a plastic seal pick to avoid scratching the piston or cylinder barrel. Lay out the old seals to compare them with the new parts. Thoroughly clean the seal grooves and mating surfaces using a lint-free cloth and a solvent approved by the manufacturer. After cleaning, perform a detailed inspection: check the piston rod for scratches or corrosion, check the cylinder bore for pitting, and confirm that the seal groove remains square and intact. If any metal surface is worn beyond the allowable tolerance, consider professional regrinding or replacing the piston rod or cylinder barrel. Accurate inspection at this stage prevents premature failure of new injection moulding machine seals and ensures reliable operation of the cylinder assembly at high injection pressures.
Selecting and Installing Replacement Seals
Choosing the proper replacement seal is crucial for the optimal performance of your injection moulding machine. Select the original seal material, such as general-purpose nitrile rubber, heavy-duty PU, or high-temperature PTFE, based on the machine’s operating conditions. Verify the dimensions—both inside and outside diameters, as well as cross-sectional thickness—in your service manual. Before installation, lightly lubricate the seals with a compatible hydraulic fluid to ease assembly and reduce initial friction. Please start with the piston seal: Gently compress and slide into its groove, ensuring a smooth seat.
Next, install the rod seal and rod oil wiper at the cylinder head end, taking care not to twist or stretch them. Use an installation sleeve or a soft plastic spacer to guide the seal smoothly across the piston rod, preventing scoring. Once you install all seals correctly in their grooves, reassemble the cylinder head and tighten the gland nuts to the manufacturer’s specifications.
Best Practices for Cylinder Seal Maintenance
Replacing an injection moulding machine’s cylinder seals is a highly technical but critical maintenance task that ensures hydraulic system integrity, consistent performance, and reduced downtime. By identifying wear indicators, preparing the proper tools, following safe disassembly procedures, thoroughly inspecting components, and precisely installing new seals, technicians can restore cylinder functionality and extend the life of critical injection moulding components.


